Tuesday, July 19, 2016

DIY Healthy Watermelon Popsicle Recipe


Hey everybody, it's Bear!

I hope you are all enjoying your summer vacation! However, as we all know, summer can be excruciatingly hot. Popsicles are a common way to cool down during the summer, they are sweet and tasty and seem to be just the right temperature when consumed during the summer. The summer's vicious heat paired with the popsicle's delicious iciness; it's a match made in heaven!

However, the majority of the popsicles you can find in stores are filled to the brim with potentially carcinogenic food colourings and preservatives! Despite being low in calories, I would recommend consuming them in moderation. "But Bear; What else can I eat to cool myself down during the summer?", you may ask, to which I will answer: popsicles! You must be exceedingly perplexed by now, allow me to explain: No, I am not giving you an answer that is contradictory to my previous statement (well, I guess I am on some levels), as today I will show you how to create your own popsicles using fruit juice! I would recommend consuming these...well...as often as you'd like to!


Here's what you'll need:
  • Water
  • Watermelon (you can use any fruit of your choice Hrt)
  • Optional: Honey/Maple syrup/Any sweetener of your choice
  • Popsicle molds
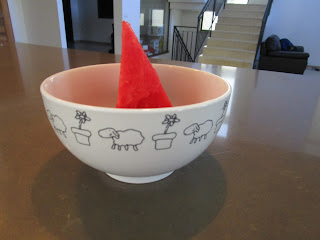
Step 1. Place a piece of watermelon in a bowl.


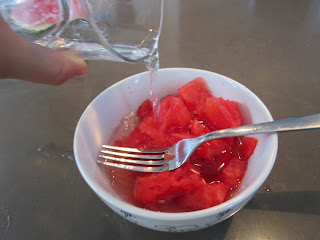
Step 2. Crush your watermelon using a fork. I personally believe listening to One Way by Blondie makes this even more enjoyable *die watermelon, die*


Step 3. Add an appropriate quantity of water to the bowl.


Step 4. Pour your mixture into a glass, this will make pouring it into your popsicle molds much easier.


Step 5. Pour your mixture into your popsicle molds.


Step 6. Place your popsicles in the freezer to set for 2-8 hours.

Step 7. Carefully remove your popsicles from the molds.


Tuesday, July 5, 2016

The Hulk's Favourite Face Mask - DIY Green Clay Face Pack

Hey, it's Bear!
As some of you may know, clay masks are excellent at absorbing excessive sebum as well as minimizing large pores, however many of them can be too drying for people with dry skin such as myself. 


However, green clay is one of the few types of clay that are suitable for dry or sensitive skin as well as oily skin, as despite drawing out excessive sebum, it won't dry out your skin. It's also non comedogenic (won't cause acne) and won't irritate your skin.

Green clay is also well known for it's powerful anti inflammatory properties as well as it's unique mineral composition consisting of dolomite, magnesium, silica, phosphorus, manganese, copper, calcium and zinc, can help remove impurities from your skin as well as help with acne.

How to make a Green Clay Face Pack


Here's what you'll need:
  •                                                           Natural green clay
  •                                                                  Green tea
Step 1. Place 1-3 teaspoons of green clay in a glass of cold green tea. Let this sit for 1-2 hours.

Step 2. After 1-2 hours, you should be able to scoop out the clay from the bottom of the glass using your fingers.

Step 3. After cleansing your face, spread an even layer of clay on your face. Leave it on for 10 - 15 minutes.

Step 4. Enjoy being The Hulk for 10  - 15 minutes.
Image result for the hulk

Step 5. Rinse off the clay pack with warm water, followed by cold water (to close your pores).
Apply toner and moisturizer.

Expect soft, clean, smooth skin the following day! ❤️ Your skin will also be exceedingly moisturized, due to the fact that moisturizer tends to fully absorb into your skin when it isn't blocked by your skin's sebum. This can be highly beneficial for dry skin. This face pack can be used once a week, but can also be used twice a week as a blackhead mask. Don't forget to use moisturizing face masks as well! ❤️❤️❤️